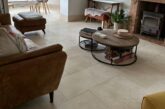
Easy to lay, low cost and self-levelling, anhydrite – or calcium sulphate – screeds are becoming more and more popular for new builds, domestic extensions, conservatories and small commercial jobs.
While there are many benefits associated with anhydrite screeds, tradespeople need to be aware of the many potential problems when you come to tile them.
The main issue with anhydrite screeds is their relatively high moisture content which means they take considerably longer to dry than conventional sand and cement screeds.
According to British Standards, an anhydrite screeds needs to dry to no more than 75 per cent relative humidity (or 0.5 water by weight) before tiling can commence.
To reach this moisture content, the drying time for anhydrite screeds is approximately 1mm per day up to 40mm in ideal conditions – that is where the air temperature is 20°C with a relative humidity of not greater than 65 per cent. Where the screed is thicker, or with poor drying conditions – pretty usual for the UK – drying times can be significantly increased.
This means that a typical anhydrite screed dries in about 49 days – compared to around 21 days for ordinary Portland cement. The speed of drying can be improved by a) increasing the ventilation in the room, b) application of external heat e.g. space heater combined with the use of industrial dehumidifiers in order to remove water vapour, and c) where applicable, commission the underfloor heating after 7 days.
Poor drying is often a cause of failures, which is why you should test the moisture content with a Hair Hygrometer (test relative humidity) or a Carbide Bomb Testing (water by weight).
Testing the moisture content
At Dunlop we can test the moisture content of a screed for you and give you guidance whether it’s ready for tiling. If underfloor heating is incorporated into the calcium sulfate based screed, allow the screed to dry for a minimum of 7 days before commissioning of the underfloor heating.
Gradually increase the temperature by approximately 5°C per day from the minimum recommended operating temperature until the maximum required working temperature is reached. Maintain this temperature for a minimum of one week. Following this reduce the temperature gradually to 15°C or turn off the system completely to achieve this prior to tiling. If force drying of the screed is required please consult the heating system manufacturer.
Another common cause of problems is laitance – a weak layer that is formed at the surface of the screed as the anhydrite cures.
If this is not removed prior to tiling, this weak layer prevents proper bonding of the tile adhesive, potentially causing the floor to fail. Even so-called “low laitance” screeds need the top layer to be sanded off before tiling.
Laitance should be removed by light abrasion using a suitable sanding machine i.e. a rotary floor scarifier and a 60s grit sandpaper. Remove excess dust completely with a vacuum cleaner. Abrading the surface is best carried out 4-6 days after the application of the screed and can assist in the drying out process. Once the screed is dry, the surface must be scarified again by the tradesman fixing the tiles to remove laitance and any surface contamination.
Another common cause of failure when tiling onto anhydrite screeds is the formation of so-called “Ettringite”. This occurs when the cement in a tile adhesive reacts with the gypsum in the anhydrite screed, forming mineral crystals at the interface which can cause debonding.
To combat the formation of Ettringite, ensure that the surface is dry and sealed with two coats of Dunlop Tilers Primer as per instructed.
When selecting your tile adhesive, consider what tile type you have chosen and the application/setting of your tiling. Consider a flexible tile adhesive such as Dunlop Flexible Rapidset Tile Adhesive or Dunlop Flexible Slowset Adhesive.
When the adhesive is cured, the joints between the tiles should be filled with a suitable flexible grout such as Dunlop GX-500 Flexible Grout– a minimum of 3mm is usually recommended for grout joints and movement joints must always be considered, using a profile movement joint or silicone sealant such a Dunlop FX-90.
![]()


