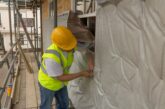
Loft and barn converters take note: the latest Actis product is a super thin, speedy and thermally effective insulation solution.
The first tranche of builders and specifiers to use a new style of insulation created by the manufacturers of the popular Actis Hybrid range have been as delighted with its ease of use and functionality as its creators predicted when they launched it in the spring.
The first major new product to hit the merchants’ shelves from the manufacturer in a decade, Eolis HC ensures installation is not only twice as quick as traditional alternatives but has also been heralded as a way to transform insulating lofts and barn conversions. The two-in-one reflective insulation with an integrated vapour barrier enables builders and roofers to reduce the number of steps required to achieve an impressive U-value as well as airtightness in roofs.
Triplex technology means it is especially useful for those dealing with shallow rafters where headroom is at a premium. Part of the reason for this, in addition to the thinness of the product, the bulk of whose insulating property lies in its air gaps, is because it doesn’t require the usual 25mm air gap to avoid condensation – at least for most locations throughout the UK.
For the boring but necessary regulatory details about why this is, click here. Otherwise, just take our word for it and read on!
Using Eolis HC instead of PIR board means there’s no need to cut insulation between each rafter – thus eliminating the need for all the time-consuming, tricky and dusty cutting that entails. Instead, installers can just lay the product, like a blanket, across the rafters on the inside (warm side) of the building, sealing each section to the next with an integrated self-adhesive lap.
Time trials show that when insulating a roof, installation time using BBA-certificated Eolis HC is at least twice as quick as insulating between rafters with PIR board for that very reason. And while speed and ease of use is perhaps its headline plus point, it has others – such as not producing irritating dust or fibres, making for a healthier and more pleasant working environment – and meaning no respiratory protection is required. It’s also better for the environment and the health of the occupants of the home it’s used to insulate.
Rated A+ for its environmental impact, Eolis HC has a BREEAM exemplary level of VOC release for indoor air quality and contains no harmful chemicals. It’s made with 100% recyclable components and the unique structure of the Triplex technology from which it is made allows less material to be used to achieve a U-value which would otherwise require a thicker product.
And with climate change leading to hotter summers and the new Part O (for overheating) of the Building Regulations now in force, it’s handy to know that the reflective films from which it is created reflect 95 per cent of infrared radiation, helping homes stay cooler in hot weather as well as warmer in the winter.

How to install Actis Eolis HC in an existing roof….
- Remove the packaging. OR – if you need to cut it lengthwise, do this before removing the wrapping, using an insulation saw.

- Use Eolis HC with the grid pattern copper-coloured film facing the inside (the warm side) of the building.
- Install the product across the face of the timbers, taking care that the insulation thickness is maintained between fixing points. Staple to the timbers every 250mm, using min 14mm galvanised staples.

- Align a timber batten where the product is fixed onto the rafters and cut along with an Actis cutter or a sharp knife, pressing the timber batten firmly onto the product.
- Butt-join and overlap Eolis HC with the next layer of the product and seal using the built-in self-adhesive tape. Vertical joints should be butt-jointed and sealed with Actis tape
- All perimeter edges, including around windows and doors, should be stapled every 50mm and secured with tape and batten.

- Fix horizontal or vertical battens (size in accordance with specification eg 25mm, 38mm, 50mm battens), nailing or screwing through the Eolis HC to the timber structure in preparation for the plasterboard stage. Where joints between plasterboard sheets are unsupported, timber noggins should be installed.
……and in a timber wall, follow the roof instructions above, with one additional, final step:
- Around windows and doors, seal Eolis HC with Actis tape and secure with a batten
The easiest way to learn how to install new Eolis HC is to watch one of the helpful Actis how to step-by-step videos. As well as an overview showing the start to finish process from unpacking to plasterboard, there are also mini, bitesize snippets showing how to cut the product, how to insert electrical wires and pipes through the Eolis and how to cut round doors and windows. You can access all of these by visiting EOLIS HC – ACTIS Insulation – Tomorrow’s insulation today (insulation-actis.com).
You can also watch a timed installation video demonstrating how quick and easy it is to install Eolis HC here: EOLIS HC – Timed installation video – YouTube.


