A good-sized rear bay window, and robust sliding patio door, leading into a 10ft x 12ft polycarbonate glazed teak conservatory, and a decent sized paved area, laid to concrete slabs.
Hard to believe now but the above was cutting edge stuff, and as good as it got a quarter of a century ago. Certainly, the envy of the vast majority of noisy neighbours in this leafy Hertfordshire suburb. And yet, as the years passed, suddenly the Taylor family found they weren’t quite living the dream. The Georgian-paned window obstructed the view to the rear garden, the fixed panel arrangement of the patio door restricted access, and the conservatory…. well, the problems are all well-documented. Cold and uninviting in winter, stiflingly hot in the summer months, and a roof which was impossible to keep free of light diffusing moss and general detritus.
In short, the whole set up had become decidedly unloved, and in no way conducive to modern family life, where the emphasis is on enjoying a more continental living experience. Worse still, many of those jealous neighbours had taken the plunge and opened up the indoors to the outdoors with the wide, unrestricted opening and smooth action of the latest must have accessory – the bi-fold door.

It seems the crunch came at the end of the last summer, as the nights started to draw in, and the next door neighbours could still be heard noisily enjoying the best of both worlds as they entertained visitors long into the night. As property owner Pete Taylor explains: “There really was no other option than to start again – take down the old conservatory, remove the patio door and knock out the bay window to lead into a new brick built extension. A priority, of course, was the ability to access the garden without fuss and, under increasing pressure from the family, I spent many a long dark evening through the winter on the computer researching the bi-fold market, and quickly discovered that the choice is vast, with a somewhat bewildering range of prices.
“My local builder gave me a heads up on a few suppliers he was familiar with, and was happy to leave the final decision to me. Eventually, I settled on Quickslide, a leading window and door manufacturer based in Yorkshire, but with a network of approved installers across the UK. Importantly, the frame was aluminium, which I was told was the best option, and the profiles looked sleek enough to maximise the natural daylight coming in. The safety and insulating properties of the glass, together with an approved high security locking system, with anti-lift blocks was also an important factor in the eventual decision.”

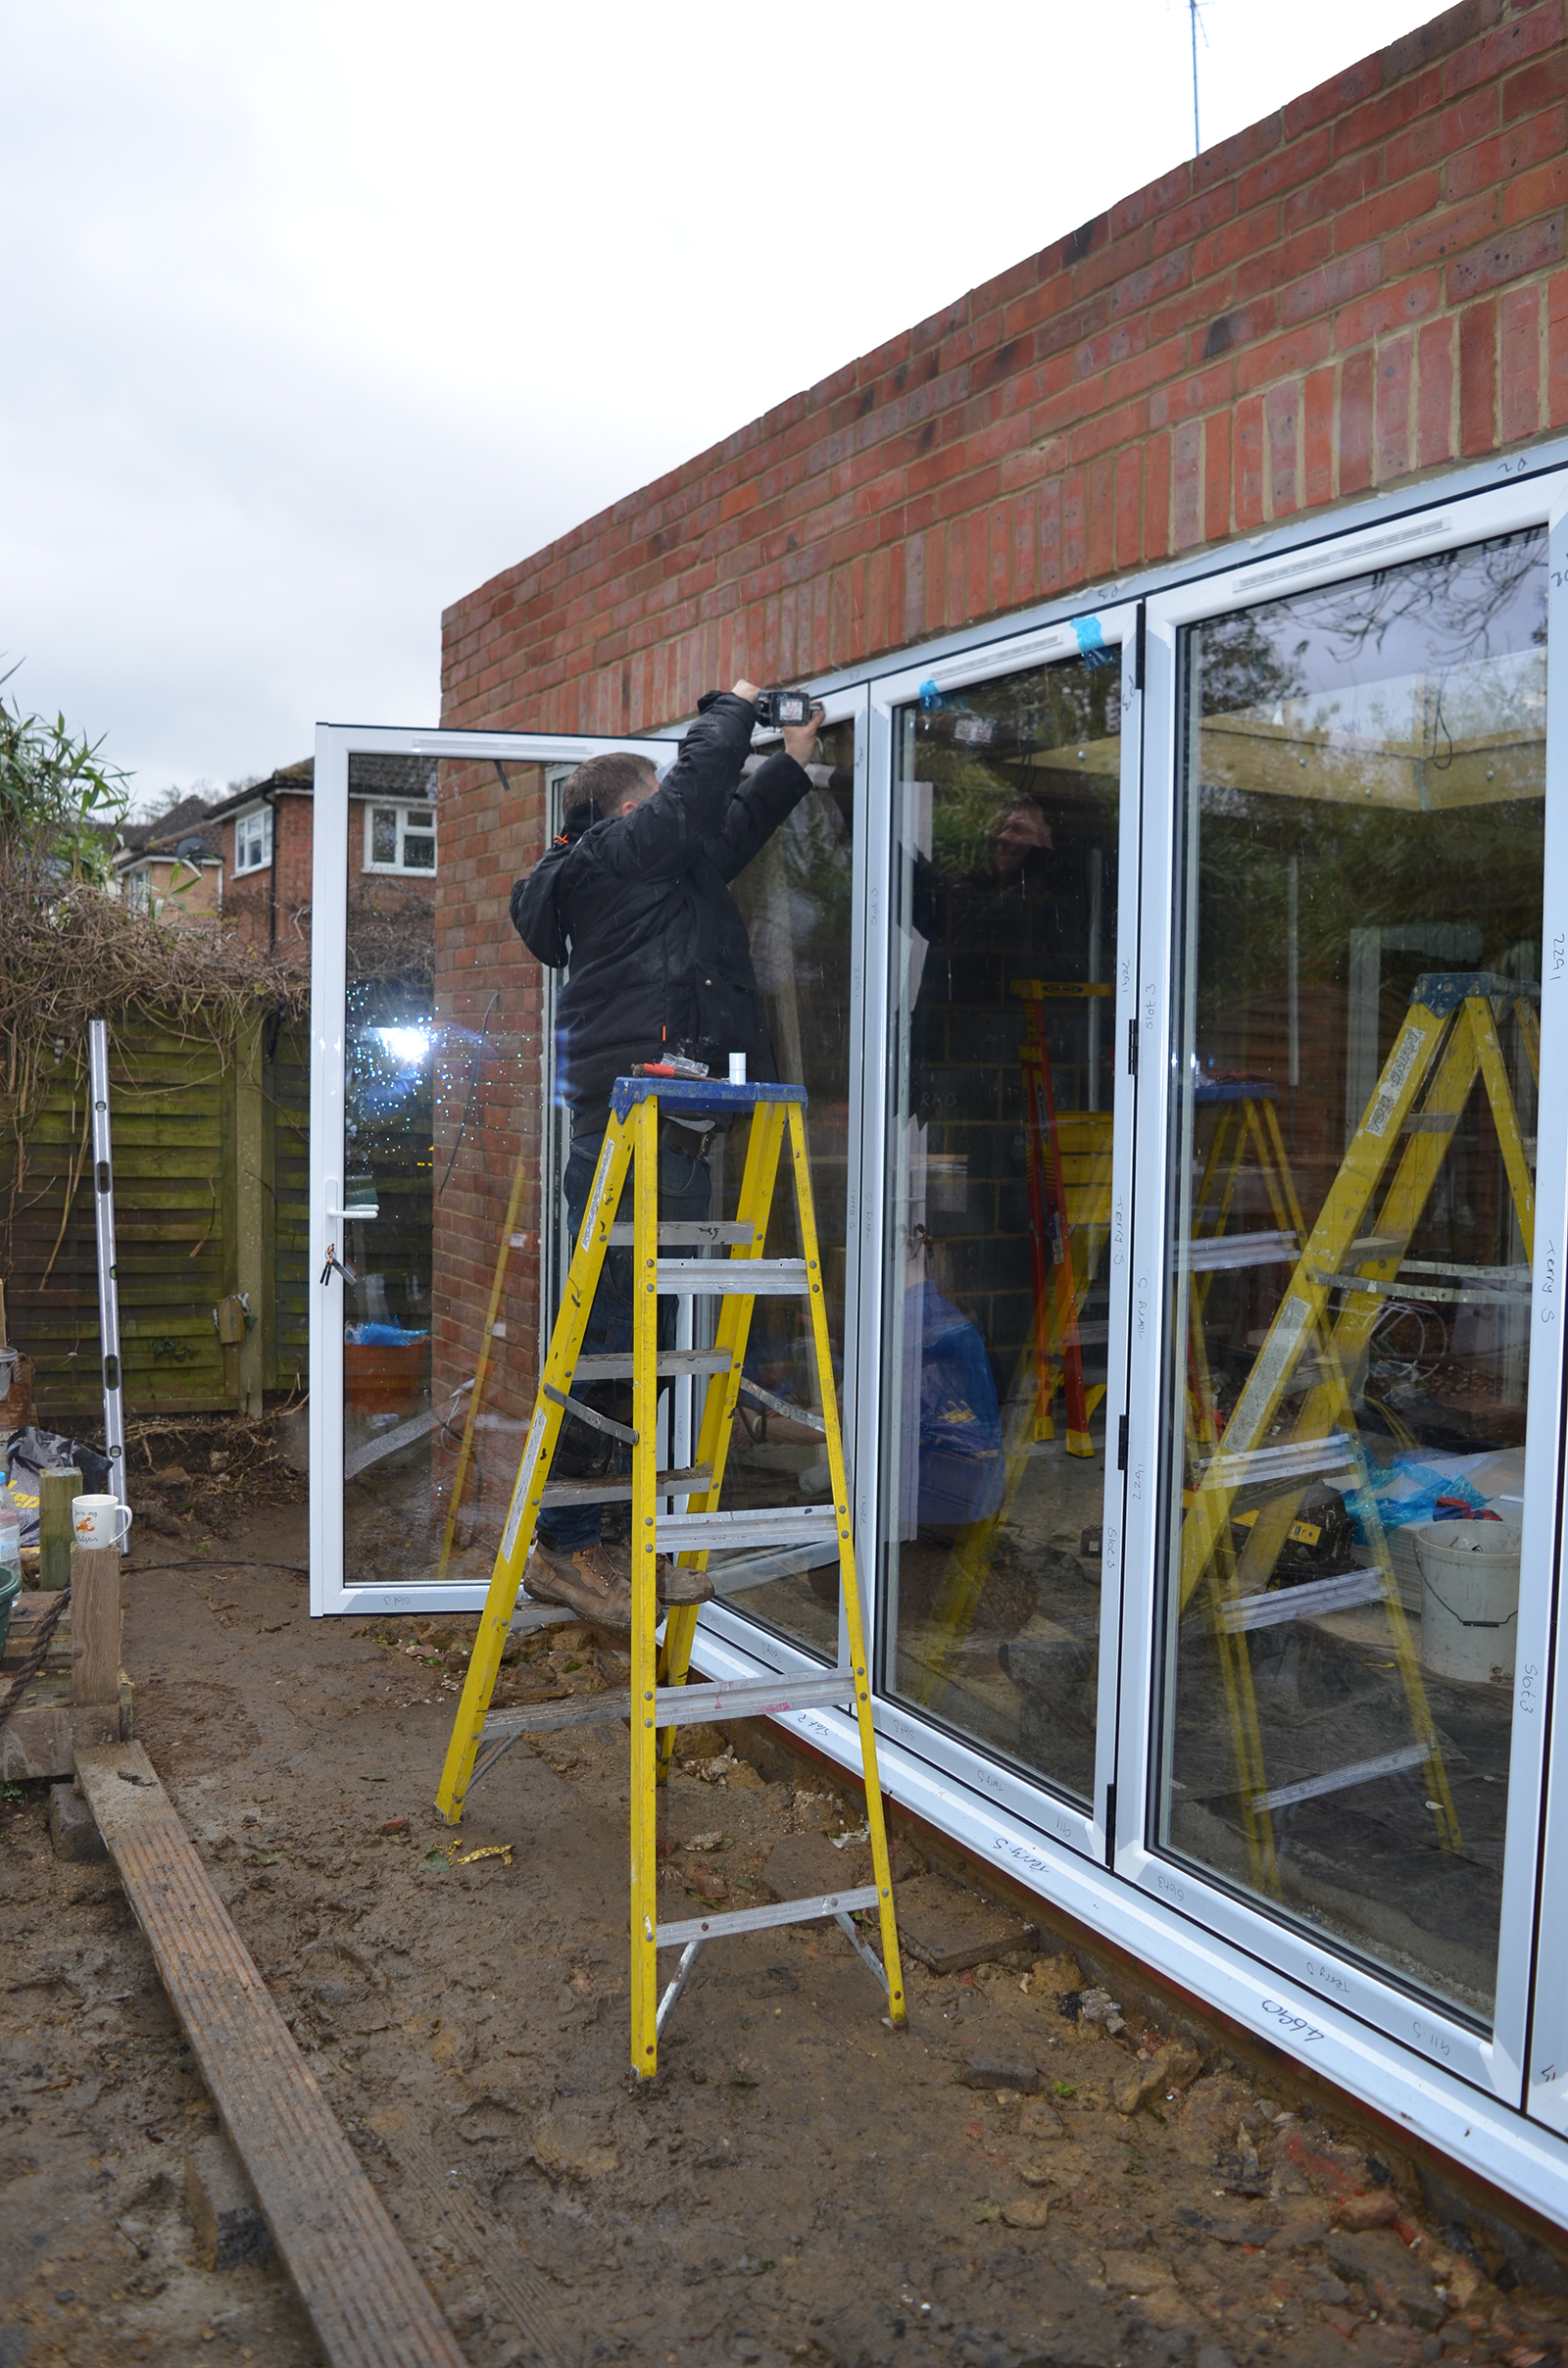
He continues: “Once the foundations, base and lintel supporting piers were in place, they arranged for a surveyor/installer, Danny Noble, to visit the site and make sure all the measurements were correct and the various options discussed. These were relayed back to the factory, and within a couple of weeks Danny and his mate were back down at the crack of dawn with the units,” enthuses Pete.
“As installations go this one is fairly typical,” explains Danny, who has worked in the window business for more than twenty five years, the past five working exclusively with Quickslide products. “However, you can’t overstate the importance of the initial survey, because any discrepancies in the build can be overcome before we get to the manufacturing process. You basically need to measure in three points and then deduct 15mm from the tightest point for fitting allowance. Having the builder on hand is always helpful too, as we can talk through the job and here we decided that an extra course of bricks would be needed to achieve a level threshold leading out onto the new decking area.”

As one of the UK’s leading fenestration companies, Quickslide can supply bi-folds in many configurations, from two panels up to eight, and a height extending to 2.5m. There’s a choice of standard grey and white plus a multitude of bespoke ones and, with a U-value of as low as 1.4, they comfortably meet all Building Regulations. Here, a five panel configuration would fit the bill, and by tea break the framework and sill were in place with a good bead of silicone along the upstand, and a similar amount applied on the inside of the sill end caps. As Danny is quick to point out: “This is a crucial part of the installation if call-backs for potential ponding problems are to be avoided, because the sill is designed to flood and weep out of the front below the frame, in much the same way that shower screens weep into the shower tray, so it’s important not to make the mistake of sealing the front edge. The frame is self-draining through strategically placed weep holes, and I will be emphasising to the customer the need to keep the bottom track clear of debris to help draining.”
He continues: “The placing of the fixing holes is also vital, because it means that the masonry fixings line up with the hinges to support the frame where the load is. You also need to make sure you get some good fixings in the head. When the outer frame is in, upright and square you are practically there. The unglazed panels simply hang onto each other with five hinges, which are already set so all you do is pop the screws in and do them up. The doors can be angled to get the top runners into the track, and then slid along until the bottom runners are on the track.

“There are four stainless steel jockey wheels and two stainless steel runners, so it runs smoothly and should never jump off. If the track is level, once you put the final self-drilling screw in, that fixes the hinge position in the frame, and nothing should move. It’s all pretty straightforward, although a lot of builders I speak to are genuinely nervous about installing bifolds. The glazing element is the bit which seems to trouble them the most and, whilst I might be talking myself out of work here, they really shouldn’t be concerned as long as they follow the basic rules, and understand the concept of toe and heel, as well as placing the wedges and packers accordingly.
“The sealed units automatically brace the aluminium frames to stop them being pulled out of square and, when the glass is in, you need to pop the glazing beads back in and the final bit is pushing the rubber gasket to secure the sealed units. The best way to do this is to place some plastic wedges in to press the glass against the outer seal, which allows more room to push the rubber in. It’s also a good idea to build a few small loops to the gasket so you can compress the seal along its length. This prevents it shrinking back to leave gaps at the mitres. “There is a final check on the lining by measuring down from the frame edge to the glazing bead to the required 11mm and, of course, if all else fails, there are some very useful printed instructions, as well as a video and online door designer. In my experience, as long as you keep a spirit level and tape rule handy, plus a willing pair of additional hands at all times, you shouldn’t go far wrong.”

With Danny preparing to head back north up the M1 before the dreaded Greater London crawl home, the customer arrived at the job to check on the progress. “This feels like a massive step forward towards the completion of the project, and I’m delighted with the look and feel of the Quickslide doors,” confirmed Peter, as envious faces started to appear over the neighbouring fences.
For further information on Quickslide’s range of Bi-Fold Doors visit quickslide.co.uk/doors/bi-fold-doors/
For a step-by-step guide to installing a Quickslide Aluminium Bi-Folding Door visit quickslide.co.uk/doors/bi-fold-doors/aluminium-bi-folding-doors/
For a video guide on how to install the doors visit youtu.be/uIwo4kt0Iik