Over time – and as a result of temperature changes and weather conditions – sand and cement mortar can crack and fall out. Roofs also naturally experience some movement, which can exacerbate this. As such, mortar-fixed ridge systems and roof accessories require regular maintenance. Not only that, but mortar is also much more time consuming to install than dry ridge and hip systems.
By contrast, dry ridge systems require very little maintenance as there is no need to replace cracking mortar. Dry fix ridge systems involve fitting ridge and hip tiles to a roof with screws and clamps.
Through mechanically fixing, dry fix solutions can be used to secure areas of the roof such as Ridge and Hip, Verge, valley and bonding details, which traditionally would have required mortar. The majority of roofs in the UK use dry fix components. In fact, BS 5534 no longer acknowledges mortar as having any tensile strength, which suggests that if mortar is used on the roof there should also be a form of mechanical fix to the component in question. This includes simple repairs or in period or heritage properties.
There are additional benefits of choosing a dry ridge kit including:
Weatherproofing
The screws and clamps used to fix dry ridge systems are robust and mean that roof tiles are less likely to become dislodged and cause damage to the roof or anything below. Plus, the threat of water ingress is reduced for dry ridge systems because the waterproof unions beneath the screws diverts water away from joins and junctions. During adverse weather conditions or periods with strong winds, this is crucial.
Ventilation
Condensation remains a potential threat and BS 5250 (The Control of Condensation in Buildings) outlines roof space ventilation requirements for minimising risk. This is where opting for ventilated ridge products can be a huge benefit. They provide a level of ventilation that may not be possible with traditional mortar-fixed roofs.
Vented dry ridge systems provide a continuous gap which allows for air movement within the roof space. This air gap also eliminates pockets of still, moist air, which can increase condensation risk. Specifically, the roll-out ridge kit can allow moisture to move out of the roof void, which helps to prevent the build-up of condensation that may lead to rot and other issues that can lead to structural damage.
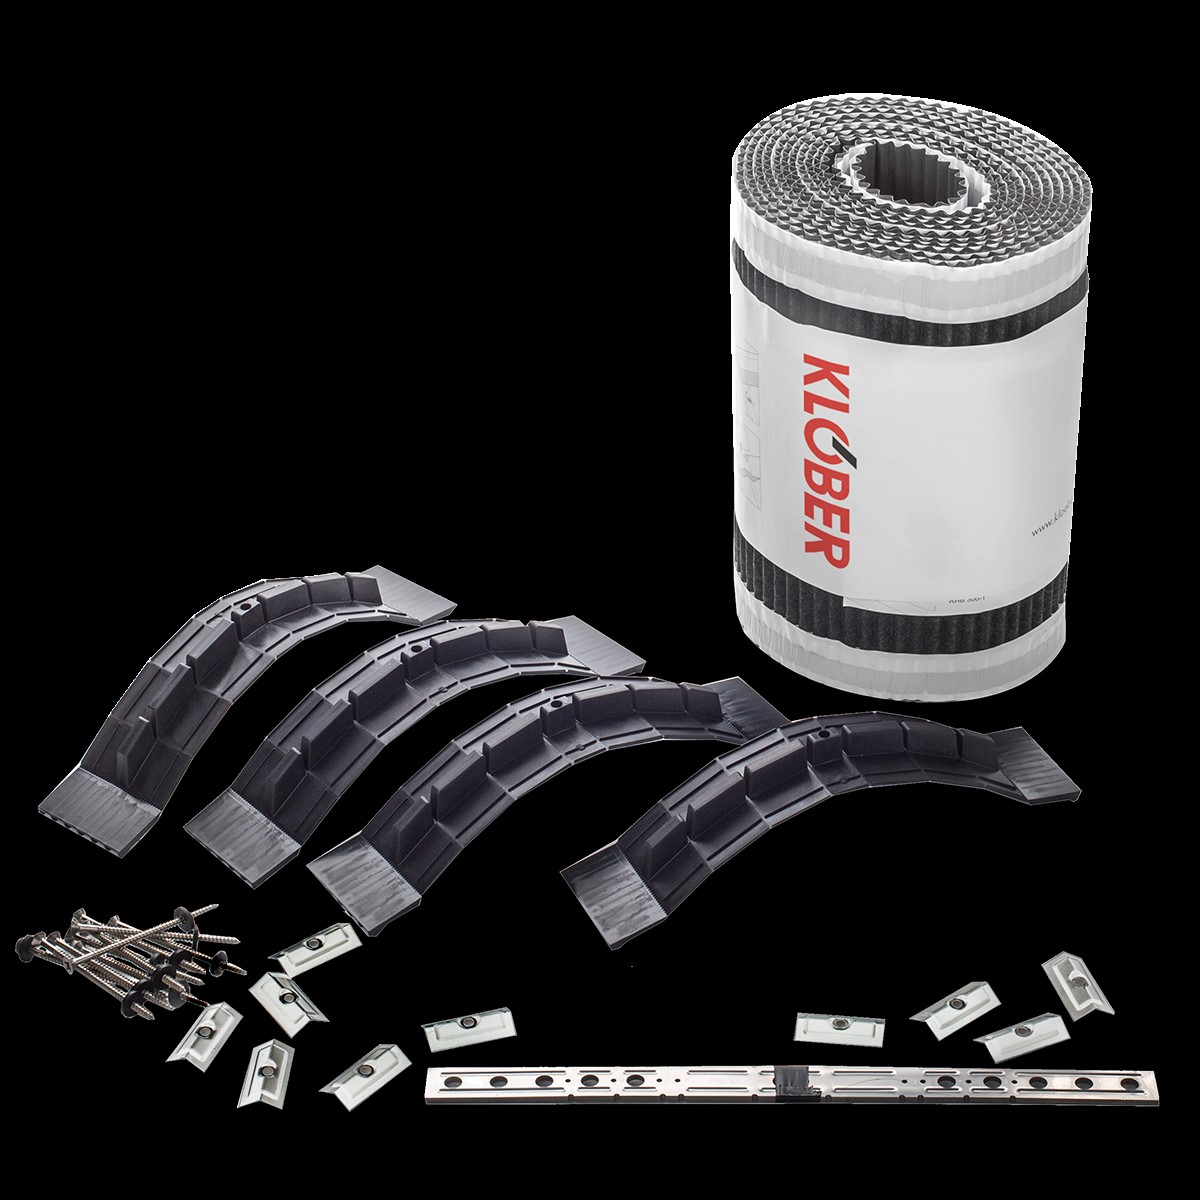
Ridges and hips for roofing
Klober extended its dry ridge range in 2021 following positive feedback on its 6m Dry Ridge Kit. In November 2021, a 10m kit was brought to market as well as a Ridge Kit with fixed lugs.
For added peace of mind, all kits comply with:
- BS 8612 = performance
- BS 5250 = ventilation
- BS 5534 = mechanical fixing
Given that ridge ventilation systems and accessories are fitted on the peak of the roof, secure installation cannot be underestimated. Let’s take a look how to fit a dry ridge kit:
Installation Tips

First step is installing the roofing membrane and battens, which can be done as normal. It’s key to leave the underlay 30mm short of the apex on both sides for ventilation. At this stage, the top tiling battens should not be fixed. If no ventilation is required, roofers may wish to carry the underlay over the apex.

Then, construct the ridge batten with 25mm thick tiling battens. The height should allow for a minimum 15mm penetration with the 100mm screws and washers. For most tile profiles, two battens will be sufficient.

To secure the battens in place, use the stainless steel Batten Straps provided in the kit. These should be fixed to the rafters on both sides using 30mm by 2.65mm stainless steel nails.
The built-up battens should be nailed together through the holes in the top of the batten strap, using 65mm galvanised steel nails. If the system being fitted is Klober’s dry verge, the ridge batten must overhang approximately 35 mm at each gable.

Fix the top tiling batten as normal, ensuring there is space for the lugs of the tile to sit and an airgap remains.
Roofers should then lay and fix the tiles as standard.
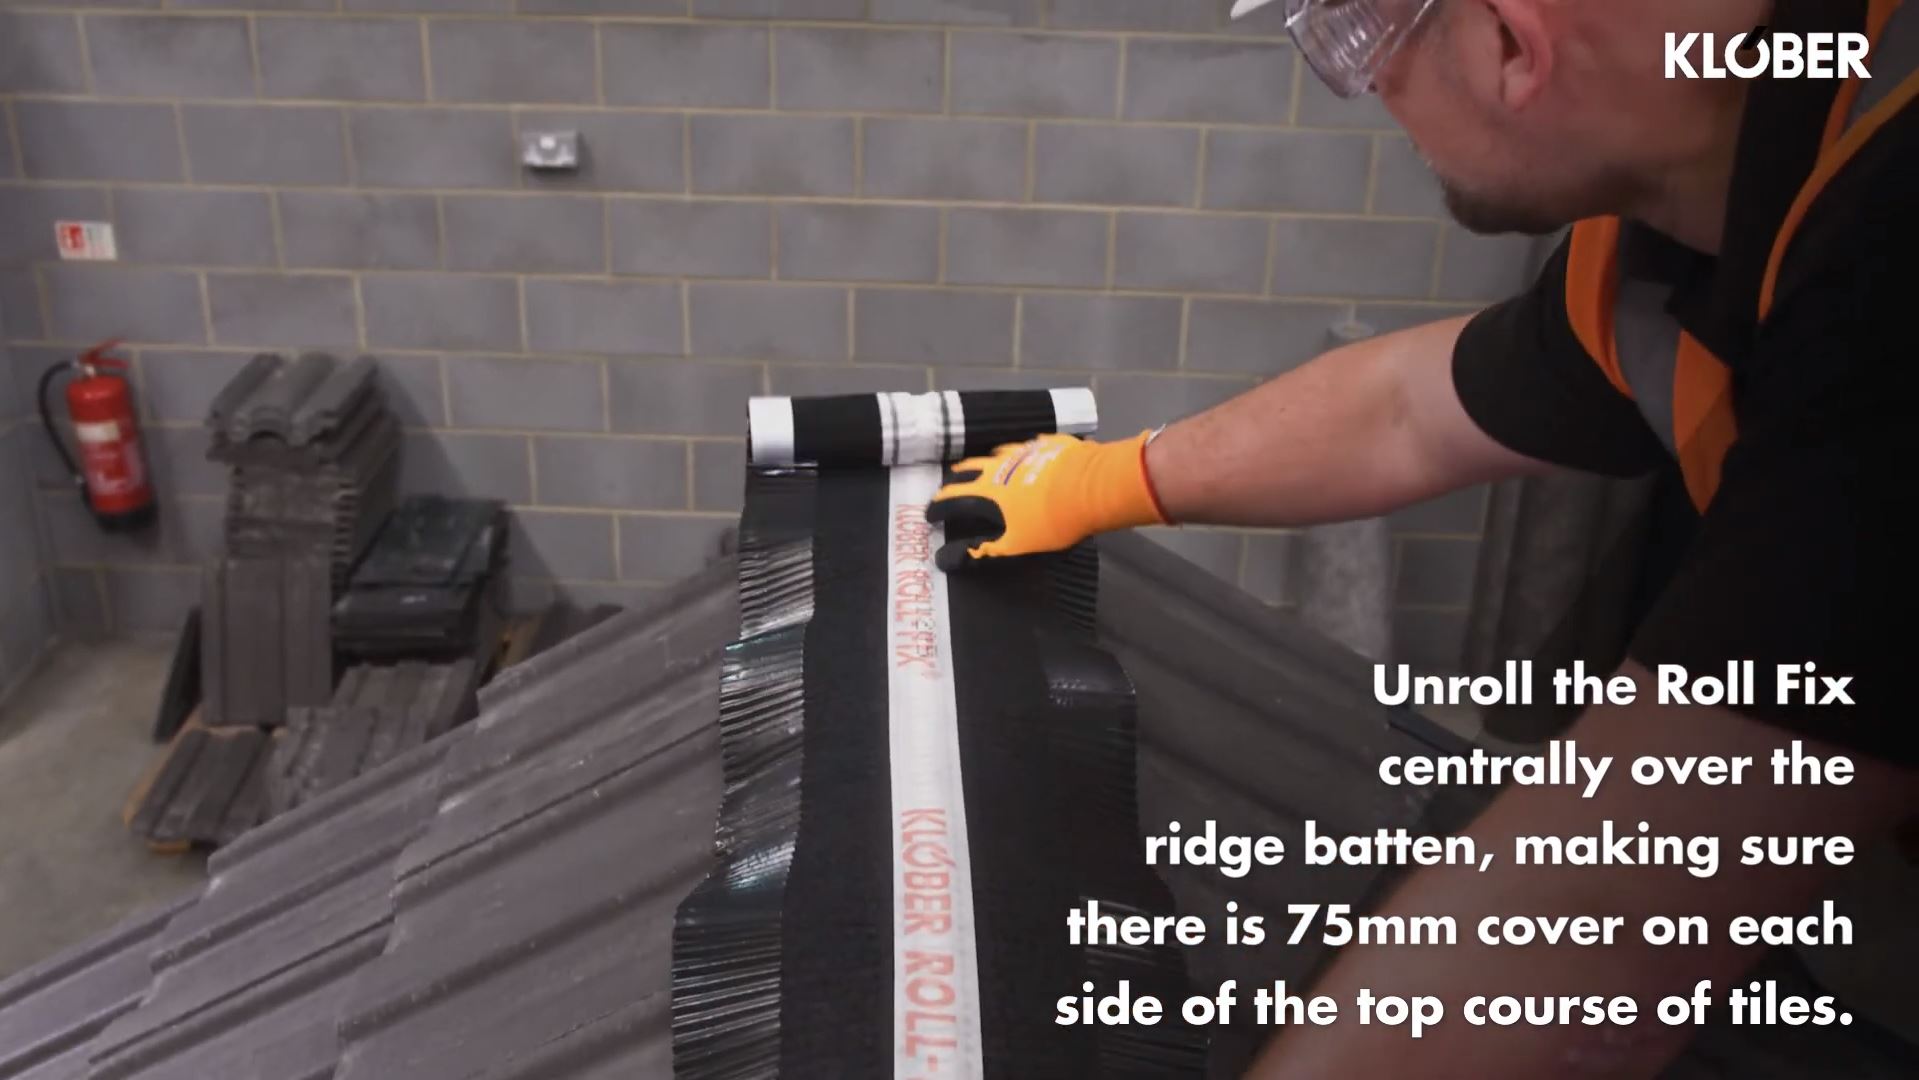
Starting at one end, the roll fix will need to be unrolled centrally over the ridge batten. Ensure there is 75mm cover on each side of the top course of tiles, and sufficient to fold down at each gable end over the batten ends or dry verge.

The roll fix must be secured in place through the white spine, using corrosion resistant nails or staples at minimum 300mm centres. The laps for joining roll fix lengths together should be a minimum of 75mm.

Remove the release paper from the adhesive strip. Dress neatly into dry, clean and dust-free tile surfaces, ensuring continuous contact with the tiles. Continue this process along the ridge line.
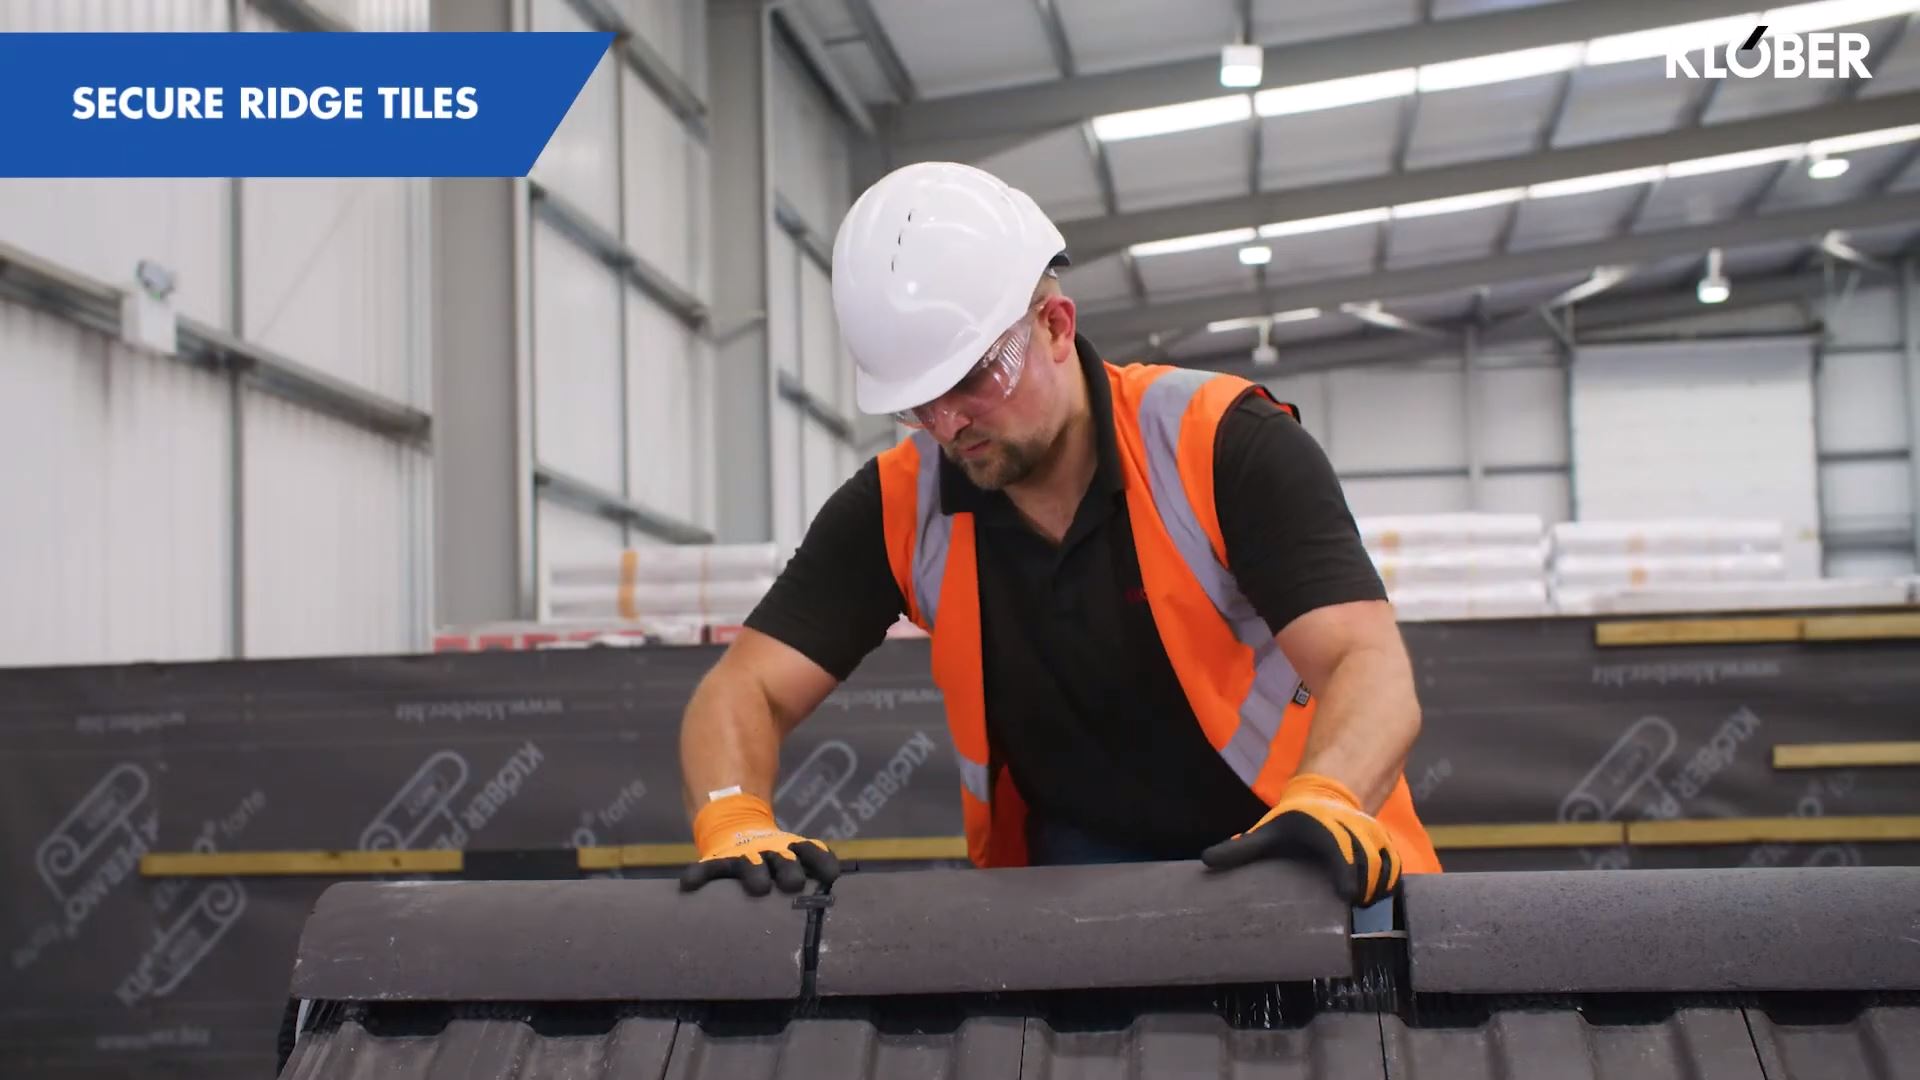
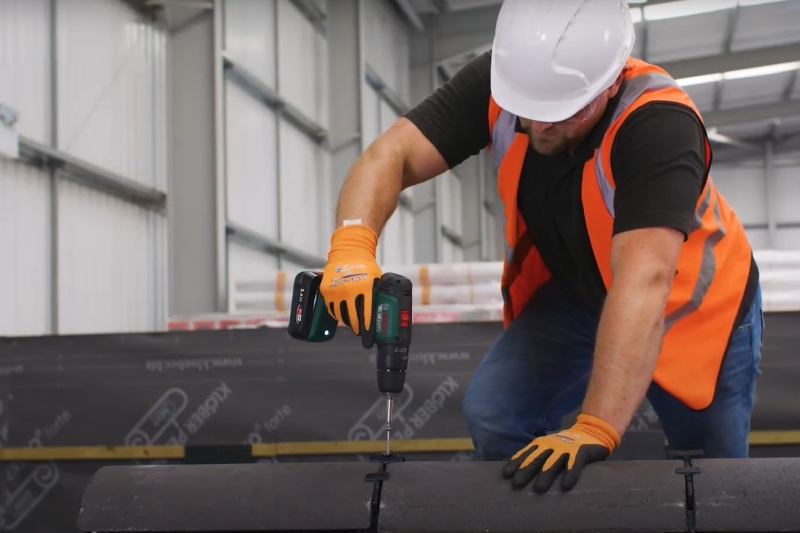
Place the end ridge tiles centrally over the white spine of the Roll Fix and insert the ridge seal under and between the ridge tiles

Secure the ridge tiles with the 100mm screw, washer and clamping plate provided in Klober’s dry ridge kit. This process should then be continued along the ridge line to the abutment, hip or gable. A second point of mechanical fixing is required on all abutments and gable end ridge tiles. This can be achieved by drilling and securing to a ridge batten.

Once the installation is complete, gable ends can be finished off using the Klober Ridge End Cap.
Remember: You should always seek professional guidance when installing Klober’s ridge and hip products.
To identify the best and most appropriate roofing components for the specific job, Klober’s Guide to Dry Fix is a useful resource. To read it visit: Introduction To Dry Fix Guide.pdf (klober.co.uk).


